Multimedia
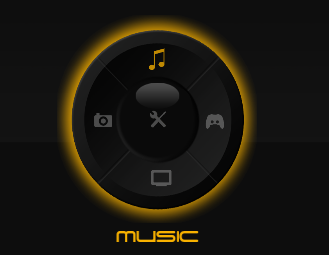
XBMC Media Center (formerly XBox Media Center) is a free and open source application for Linux, Windows, Mac OS X and Xbox, that can turn your Ubuntu 8.04 LTS or 8.10 into a veritable media center platform, with video playback, streaming video, audio, images, playlist playback, slideshows and more.
– If you’ve been using Microsoft’s Windows Media Center, then be sure to find more options with XBMC.
XBMC is now bundled into Sabayon Linux 4 Lite MCE ( a GNOME-based Linux distribution that offers a ready-to-use version XBMC Media Center)
Like any excellent Open Source application, what makes XBMC particular is its extensibility – add-ons, plugins. More»
Posted in Linux Tips and Tricks, Multimedia, Open-Source | 6 Comments »
If you have to try out new Linux distributions you’ll certainly have to spend on CDs to burn most of the ISO files or you can simply get a few CD-RWs and use them again and again, erasing and rewriting, with the popular K3b — CD and DVD burner, that has little or maybe nothing to envy Nero Burning for Linux. Amongst its many features, I find it necessary to underline that it can erase and rewrite with no issues unlike many other Linux burners.
To erase your rewritable go to Tools -> Erase CD-RW; it is right there.
In Ubuntu, you’ll find it in the repositories, sudo apt-get install k3b else go to the download page.
K3b is free and released under the General Public License.
Better still, you can use the Gnome in-built burner — Brasero aka Bonfire. Just go to Tools -> Erase and get the job done.
You can also make more bootable multimedia CDs with the tiny but great utility (8Mb) eMovix
Posted in Linux Packages, Linux Tips and Tricks, Multimedia | 2 Comments »
Extending your Amarok music player to an audio file converter is a easy as installing a Firefox plugin. To do this you simply need to download the Audio Format Converter script. This free Python script converts audio file formats between FLAC, Ogg, MP3, MPC, M4A, and WAV.
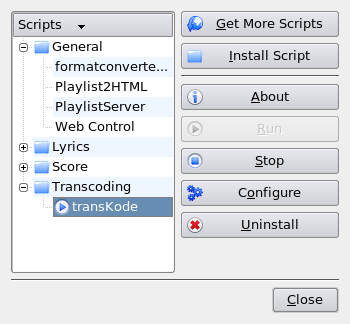
Run Amarok and move to Tools ->Script -> Script Manager and on the Script Manager window take Install Scripts and browse to where you downloaded the zipped .tar.bz and install. Audio Format Converter works in the background and depends on the already installed converting tools on your system.
To make use of it goto the Script Manager -> General-> select formatconverter and click Run, you’ll be asked to select the directory where the converted files will be placed, the naming convention of the files and finally the audio format to which the files would be converted. A pop-up window will let you know the end of the conversion, in the meantime you could play your music.
The transKode script could be better if you want to convert single files. After having downloaded and installed it, you can further configure it from the Script Manager. File converting this time around is carried out in the playlists. Right-click the audio file you want to concert, from the menu, move to transKode and choose the file format you want.
Both converters are free and are for Linux platforms only
via [Linux.com]
Posted in Linux Tips and Tricks, Multimedia | Comments Off on How to Extend Amarok Music Player to an Audio File Converter
Why not be grateful to VLC Media Player – because when it comes to video nothing is ever easy as it should be, yet this media player with an open source background is doing much to make it easy. It is constantly updated, improved, with new features coming up.
It supports playback of most of the renounced audio and video formats out there like MPEG-1, MPEG-2, MPEG-4, DivX, mp3, ogg, not forgetting DVDs, VCDs and even streaming protocols.
It also functions as a streaming media server.
On Ubuntu it takes nothing to get it installed and running
From a terminal type:
$ sudo apt-get update
$ sudo apt-get install vlc vlc-plugin-* mozilla-plugin-vlc
This command installs VLC and the necessary plugins for Mozilla firefox.
You’ll have to restart Firefox to complete the installation of this plugin.
To run this media player go to
Applications -> Sounds & Video -> VLC media player.
The VLC interface varies from platform to platform, but in general the default interface is very skinny, if you don’t mind it then go ahead and enjoy your full-functional feather weight media player. If you prefer to skin it, there several skins out there but remember the skinned version is a little bit unpredictable and confusing.
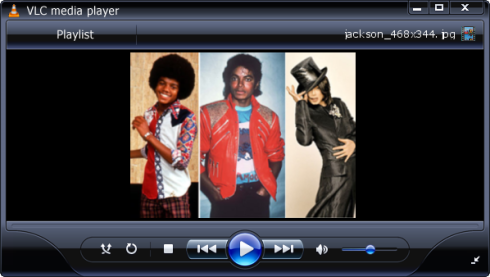
I skinned mine to look like Windows Media Player. To do so (the procedure is same for all skins) download the WMP11 skin from the skin page.
From the command-line do
vlc -I skins2
This commands brings up a very skinned player, right click on the tittle bar area and move to Select skin -> Open skin. Then choose the downloaded skin file.
The outcome would look like this;
Update: There is also a portable version of VLC Media Player (done by PortableApps.com), so you can pack-up into a portable hard drive or Cd, both your audio/video files together with the media player and use it on the first Windows PC you come across.
Posted in Linux Tips and Tricks, Multimedia | 6 Comments »


